
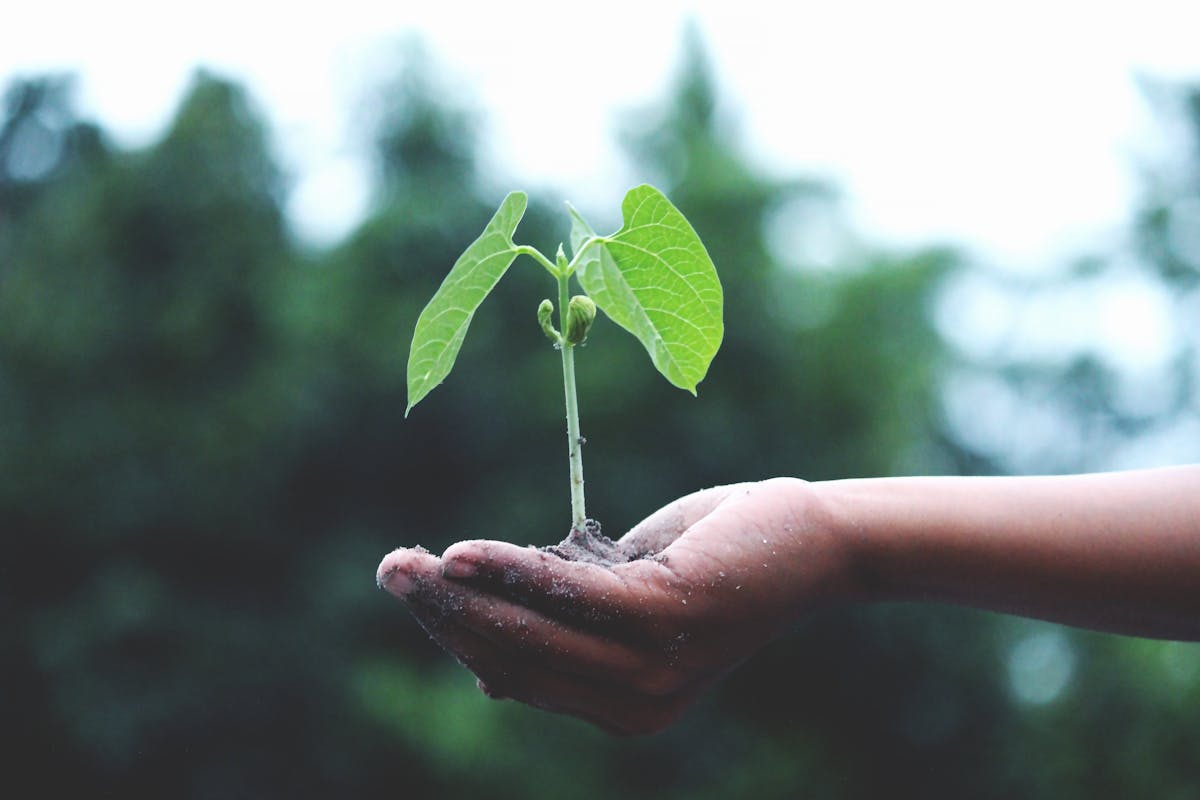
Introduction: The Hidden Threat of Compacted Soil in Your Raised Beds
Picture this: You’ve poured your heart and soul into your raised beds. You meticulously filled them with what you thought was the perfect blend, lovingly sowed your seeds, or transplanted your sturdy seedlings. You envision plump 'Moneymaker' tomatoes, vibrant 'Cosmos' lettuce, and those gorgeous 'Charlotte' potatoes thriving. But then, as the season progresses, you notice things aren't quite right. Growth seems sluggish, water pools on the surface for ages after a typical British downpour, and your plants just look… a bit miserable. Sound familiar?
That sinking feeling? I know it well. For years, especially when I first transitioned from the digital world of IT to the muddy reality of my UK garden, I scratched my head over this. I’d done everything "by the book," yet some of my raised beds, particularly those I’d had for a few seasons, just weren't performing. Here in my 800 sq ft Midlands garden, packed with a dozen raised beds and a busy greenhouse, I've seen it all. From struggling 'Red Russian' kale to surprisingly small root vegetables, the culprit was often invisible to the naked eye but devastating to my plants: compacted soil.
It’s a sneaky menace, this compaction. We build raised beds for better drainage and easier access, thinking they're immune to the problems of in-ground gardening. But over time, gravity, heavy rainfall (something we get plenty of here in Britain!), foot traffic (even accidental leans on the edge!), and simply the act of watering can compress that beautiful, fluffy soil. The result? Roots suffocate, nutrients become locked away, and your raised bed, instead of being a haven of fertility, turns into a battleground for struggling plants. But don't despair! I've spent the last five years experimenting, learning, and sometimes failing spectacularly, to find simple, no-till strategies that can bring your raised beds back to life. I’m eager to share what’s worked in my UK garden, helping you transform those tired beds into thriving havens for your homegrown produce.
Is Your Soil Suffocating? Identifying Signs of Compaction in Raised Beds
So, how do you know if your raised bed soil is crying out for help? It's not always obvious, but once you know what to look for, the signs are pretty clear. I learned this the hard way, thinking my 'Sungold' tomatoes were just having an off-year in the greenhouse because of our famously unpredictable British spring, when in reality, their roots couldn't penetrate the dense soil in their bed.
Here are the tell-tale signs I’ve learned to spot in my Midlands garden:
- Poor Drainage: This is often the first and most obvious clue, especially after a good downpour. If water sits on the surface of your raised bed for hours, rather than soaking in relatively quickly, you've got a problem. I’ve watched puddles linger in one of my older beds for half a day after a typical summer shower here in the UK, while a newer, healthier bed next to it had absorbed the same amount of rain in minutes. That pooling water starves roots of oxygen.
- Stunted Plant Growth and Yellowing Leaves: Plants just aren't thriving. Despite adequate feeding and watering, they remain small, leaves might be yellowing (a sign of nutrient deficiency, as compacted soil makes nutrients unavailable), and they just generally lack vigour. I once had a bed of 'Harbinger' cabbages that looked utterly pathetic – tiny heads, pale leaves – and when I eventually dug one up, the root ball was laughably small and restricted.
- Hard, Crusted Soil Surface: If the top layer of your soil feels like concrete, especially after it dries out, that's a classic sign. It forms a barrier, making it difficult for new seedlings to emerge and preventing water and air from properly penetrating. I often noticed this on my herb beds, where the more exposed soil would bake hard during a dry spell.
- Shallow, Restricted Root Systems: This is the ultimate proof. If you carefully dig up a struggling plant, you'll likely find its roots are short, bunched up, and haven't spread out deeply into the soil. They're literally suffocating and can't access the nutrients and water they need. My heirloom 'Black Krim' tomatoes, which should have deep, extensive roots, often showed this when I first started, leading to poor fruit set despite my best efforts.
- Increased Runoff: Instead of absorbing rainfall, your raised bed might be shedding it. You'll see water running off the sides of the bed, carrying away valuable topsoil and nutrients, rather than nourishing your plants. This is particularly wasteful during our often-drier spells in summer, when every drop counts.
- Difficulty Weeding or Planting: If pushing a trowel into the soil feels like a major workout, or if you're struggling to plant new seedlings without breaking their delicate roots, your soil is too dense. It should feel crumbly and welcoming, not like a brick.

If you're seeing even a couple of these signs in your raised beds, don't worry – you're not alone, and it's absolutely fixable! I've been there, staring glumly at a bed of 'Desiree' potatoes whose yield was dismal because their tubers couldn't expand in the rock-hard earth. Recognizing the problem is the first crucial step to bringing your soil back to life.
Beyond the Spade: Why No-Till is Your Raised Bed's Best Friend
When I first started gardening five years ago here in the UK, fresh from my IT desk, my instinct was to "dig for victory." My grandad had always turned his soil over every autumn, and I figured that was just how you did things. So, I’d grab my spade, turn over my raised beds, break up the clods, and feel like I was doing a proper job. What I didn’t realise then, and what I’ve learned through a lot of reading, experimenting, and observing in my own Midlands garden, is that for raised beds, traditional tilling or digging is actually doing more harm than good in the long run.
The truth is, while digging might give you an immediate sense of loosening the soil, it completely disrupts the intricate, delicate network of soil life that's crucial for healthy plants. Think of your soil as a bustling city, teeming with beneficial fungi, bacteria, earthworms, and countless other microorganisms. These unsung heroes are constantly working to create a healthy soil structure, cycle nutrients, and fight off diseases. When you dig, you're essentially bulldozing that city. You break up fungal hyphae (mycorrhizal networks are vital for nutrient uptake, especially for things like my heirloom 'Costoluto Fiorentino' tomatoes!), expose dormant weed seeds to light, and destroy the natural channels that earthworms create for air and water.
For my raised beds, especially after a few seasons, I completely switched to a no-till approach, and the difference has been phenomenal. My soil is now teeming with life, much more resilient to our often-wet British weather, and my plants are visibly happier and more productive. It's about working with nature, not against it.
No-Till vs. Traditional Tilling: A Raised Bed Showdown (UK Context)
| Feature | No-Till Strategy (My Preferred Method) | Traditional Tilling/Digging (What I Used to Do) |
|---|---|---|
| Soil Structure | Improved Long-Term: Encourages stable aggregates, natural aeration via earthworms and roots. Soil becomes crumbly, retains moisture better. | Temporary Loosening, Long-Term Damage: Initially loose, but destroys natural aggregates, leading to quicker re-compaction, especially after heavy UK rains. |
| Soil Biology | Thriving & Diverse: Protects fungal networks (e.g., mycorrhizae vital for 'Cherokee Purple' tomatoes), earthworm tunnels, and beneficial microbes. | Disrupted & Reduced: Destroys beneficial microbial habitats, kills earthworms, brings dormant weed seeds to the surface. |
| Water Management | Excellent Drainage & Retention: Organic matter builds up, allowing water to infiltrate deeply and be held like a sponge. Less runoff, crucial for dry spells. | Poor: Initially drains fast, but re-compacts quickly. Water can sit on surface or run off, especially on heavy clay-based raised bed mixes. |
| Nutrient Cycling | Efficient & Natural: Microbes break down organic matter, making nutrients slowly available to plants. Less nutrient leaching. | Inefficient: Rapid breakdown of organic matter, leading to nutrient loss (especially nitrogen) through leaching, requiring more external fertilisers. |
| Weed Control | Reduced Over Time: Fewer dormant weed seeds brought to surface. Mulching suppresses weeds effectively. | Increased: Brings buried weed seeds to the surface, where they germinate. Requires more weeding efforts. |
| Workload | Less Effort Long-Term: Initial effort to establish, then primarily mulching and light aeration. Saves back-breaking digging. | High & Repetitive: Annual digging is physically demanding. More time spent weeding and potentially amending soil due to nutrient loss. |
| Resilience to UK Weather | High: Better able to withstand heavy rainfall (less waterlogging) and dry spells (better moisture retention). | Low: Prone to waterlogging in wet periods and drying out quickly in hot spells due to poor structure. |
My journey to no-till wasn't an overnight switch. It was a gradual process of observing, learning, and seeing the results in my own garden. I remember one season, after a particularly wet winter here in the Midlands, one of my traditionally dug beds was waterlogged and difficult to work, while an experimental no-till bed next to it, filled with 'Black Beauty' courgettes, was draining perfectly and already showing vigorous growth. That was my 'aha!' moment. Since then, it's been a core principle in my raised beds, and my soil has never been healthier.
Immediate Relief: Gentle Aeration & Organic Matter for Better Drainage
Okay, so you’ve identified compaction, and you’re convinced no-till is the way forward. But what do you do now? You can’t just let those beds sit there suffocating your 'Celebrity' peppers! The good news is there are immediate, gentle steps you can take to relieve compaction and kickstart the journey to healthier soil, without resorting to destructive digging. I've personally used these methods to revive beds that I thought were beyond hope, turning them into productive spaces once again, even after a particularly tough British winter.
The Broadfork: Your Raised Bed's New Best Friend
Forget the spade for loosening soil. The broadfork is an absolute game-changer for gently aerating compacted raised beds. I bought mine a few years ago after a particularly soggy spring left one of my main vegetable beds feeling like solid clay. It’s essentially a large fork with long tines and two handles, designed to leverage and lift the soil without inverting it.
Here’s how I use it:
- Preparation: Clear any large debris or old plant material from the bed. If it's a very dry period, a light watering a day before can help, but don't make it muddy.
- Insert & Rock: Stand at one end of your raised bed and push the broadfork straight down into the soil. Use your body weight, not brute force. Once the tines are fully in, gently rock the broadfork back and forth, using the handles to lift and loosen the soil. You’re aiming to create cracks and air pockets, not turn the soil over.
- Repeat: Take a step back (about 6-8 inches) and repeat the process across the entire bed. I try to work in rows, ensuring good coverage. The beauty of this tool is that it respects the soil layers and the living networks within. It's a bit of a workout, but far less disruptive and ultimately more beneficial than deep digging. I find it much more satisfying than fighting with a spade, and the results are far superior for encouraging deep roots in my 'King Edward' potatoes.
This gentle aeration breaks up the compaction, allowing air, water, and roots to penetrate deeper into the soil. I typically do this once a year, usually in late autumn or early spring, before planting my main crops.
The Power of Organic Matter: Feed Your Soil, Not Just Your Plants
Once you’ve gently aerated the bed, the next crucial step is to add organic matter. This isn't just about feeding your plants; it's about feeding your soil – and its billions of microbial inhabitants. Organic matter is the glue that holds healthy soil structure together, and it's absolutely vital for improving drainage, moisture retention, and nutrient availability here in the UK.
I swear by a thick layer of well-rotted organic matter for all my raised beds. Here's what I use and recommend:
- Homemade Compost: This is gold. Every scrap from my kitchen and garden waste goes into my compost bins, and I aim to have a steady supply of rich, dark compost. I spread a 2-4 inch layer over the broadforked bed. It's packed with beneficial microbes and slowly releases nutrients.
- Well-Rotted Manure: If you have access to local farms, well-rotted horse or cow manure is fantastic. I’m lucky enough to have a few stables nearby in the Midlands, and I often get a trailer full. Ensure it’s truly well-rotted (at least 6-12 months old) to avoid burning plants or introducing too much nitrogen at once. A 2-3 inch layer works wonders.
- Leaf Mould: Collect those autumn leaves! They break down into a beautiful, water-retentive amendment that’s particularly good for improving soil structure. I have a dedicated leaf mould cage in a corner of my garden.
- Green Waste Composts: Many local councils offer peat-free, quality-checked green waste compost. While not as biologically rich as homemade compost, it's a good option for bulking up beds.
After spreading the organic matter, I don't dig it in. Instead, I just let it sit on the surface. Over time, earthworms and other soil organisms will pull it down into the soil, slowly incorporating it and doing the work for you. This mimics what happens in nature, building soil structure from the top down.
This combination of gentle aeration with a broadfork and a generous top-dressing of organic matter has been a game-changer for me. My raised beds now drain beautifully after a deluge, stay moist longer during dry spells, and my plants, from 'Costoluto Genovese' courgettes to my beloved 'San Marzano' tomatoes, have never been happier or more productive. It’s a simple, no-till approach that builds long-term soil health, saving your back and your plants!
5. Long-Term Solutions: Building Living Soil for Sustainable Root Growth
Right then, we've talked about spotting the signs and giving your compacted beds some immediate relief. But if you want to wave goodbye to compaction for good, and really unlock the full potential of your raised beds here in the UK, we need to talk about building truly living soil. This isn't just about adding stuff; it's about fostering a dynamic ecosystem beneath your feet that thrives year after year, especially with our often-unpredictable British weather.
In my 800 sq ft Midlands garden, this has been the biggest game-changer over the last five years. I used to think 'good soil' meant heavy digging and bags of peat-free compost every spring. Now, I understand it's a continuous, gentle process.
The Magic of Compost: Your Soil's Best Friend
If there's one thing I swear by, it’s good quality compost. And honestly, homemade is best if you can manage it. Compost doesn't just add nutrients; it's absolutely vital for soil structure. It acts like a glue, binding sandy particles and loosening clay, creating those crucial air pockets that roots crave. Plus, it's packed with beneficial microbes that break down organic matter and make nutrients available to your plants.
I've been making my own 'black gold' for years now, layering kitchen scraps, garden waste, and shredded cardboard in my compost bins behind the greenhouse. Every autumn, I get a fantastic haul of rich, crumbly compost that goes straight onto my raised beds. I aim for at least an inch or two across all my beds each year, often in autumn or early spring, just gently spread on top. It’s like giving your soil a superfood feast!
Mulch: The No-Till Warrior
Mulching is another non-negotiable in my no-till system. It's not just for weed suppression – though it's brilliant at that, saving me hours of back-breaking work! A good layer of organic mulch slowly breaks down, constantly feeding your soil and its microbial inhabitants. This continuous addition of organic matter is key to maintaining that fluffy, open structure.
I use a mix in my UK garden. Straw is fantastic for my vegetable beds – it's light, breaks down reasonably quickly, and looks neat. For my permanent herb beds and around fruit bushes, I prefer wood chip; it lasts longer and offers a bit more insulation. I even use a thick layer of leaf mould (collected from fallen leaves in autumn) on some beds, especially those that need a bit more moisture retention. Mulch helps regulate soil temperature, keeping roots cooler in a summer heatwave and insulating them from frosty snaps, which is a real blessing here in the Midlands.
Cover Cropping: The Living Blanket
This is a technique I've really embraced over the last couple of seasons, especially for beds that are resting or coming out of a main crop. Cover crops are essentially plants grown not for harvest, but for the benefit of the soil. Their root systems are incredible at breaking up compaction deep down, and when they're chopped and left on the surface (the 'chop and drop' method), they add a huge amount of organic matter.
I've had great success with 'Crimson Clover' and 'Winter Vetch' sown in late summer or early autumn – they fix nitrogen, which is like a free fertiliser for the next crop. For quick winter cover, I sometimes use 'Forage Rye' or 'Mustard', which are brilliant at scavenging nutrients and adding biomass. Just make sure to chop them down before they go to seed and before they get too woody, usually in early spring before planting. It feels a bit odd to plant something you're not going to eat, but trust me, your soil will thank you for it!
Here's a quick comparison of these long-term heroes:
| Feature | Compost | Mulch | Cover Crops |
|---|---|---|---|
| Primary Benefit | Nutrient enrichment, soil structure | Moisture retention, weed suppression, slow O.M. | Deep compaction busting, nutrient cycling, O.M. |
| Application | Spread on top (1-3 inches annually) | Spread on top (2-6 inches) | Sown directly into beds (seasonal) |
| Timing (UK) | Autumn/Spring | Spring/Summer/Autumn | Autumn/Late Summer (overwintering) or Spring (short-term) |
| DIY Potential | High (homemade compost) | Moderate (leaves, straw) | Low (seed purchase) |
| Effort Level | Moderate (making/spreading) | Low (spreading) | Moderate (sowing, chopping) |
| Immediate Impact | High | High | Low (long-term soil improvement) |
| UK Specifics | Adapts to various soils, feeds microbes. | Crucial for moisture regulation in our climate. | Protects soil from winter wash-out. |
6. Keep it Loose: Best Practices to Prevent Compaction in the Future
So, you've done the hard work of revitalising your raised beds. Now, the trick is to keep that beautiful, airy structure intact. Preventing compaction is far easier than fixing it, and it mostly comes down to a few simple, no-nonsense habits that I've ingrained in my own UK gardening routine.
The Golden Rule: Never Step on Your Beds
This is probably the most crucial rule, and honestly, the one I learned the hard way when I first started out five years ago. My raised beds are generally 1.2m wide, meaning I can easily reach the middle from either side. If your beds are wider, consider adding stepping stones or planks that distribute your weight evenly. Any pressure, especially when the soil is wet (a common occurrence here in the Midlands!), will squeeze out those vital air pockets and undo all your hard work. Just don't do it!
Consistent Mulching is Your Barrier
We've talked about mulch for long-term soil health, but it's also your primary defence against future compaction. A thick layer acts as a buffer against heavy rain, preventing the soil surface from crusting over. It also protects the soil from the impact of wind and scorching sun. I always ensure my beds have a healthy 2-4 inch layer of mulch, topping it up as it breaks down, which happens quicker in our damp British climate.
Diverse Plantings & Smart Crop Rotation
Think about what's happening beneath the surface. Different plants have different root structures. Deep-rooted plants like parsnips or even some brassicas can help break up deeper layers, while fibrous-rooted plants create a dense network near the surface. By rotating your crops and incorporating a wide variety of plants, you're constantly working the soil in different ways, naturally maintaining its structure. In my UK garden, I try not to grow the same 'family' of veg in the same bed for more than a season, which also helps with pest and disease prevention.
Gentle Harvesting and Weeding
When you're harvesting root crops like carrots or potatoes, try to disturb the soil as little as possible. Instead of yanking, use a broadfork or a garden fork to gently loosen the soil around them before lifting. For weeding, rather than digging, use a sharp hoe to just skim the surface, cutting weeds off at the root. This 'no-dig' approach minimises disturbance and keeps that delicate soil structure intact.
Mindful Watering
While our British weather often takes care of watering for us, sometimes you need to supplement. Avoid using a powerful jet from a hosepipe directly onto the soil, as this can compact the surface and wash away valuable topsoil. Instead, use a watering can with a rose attachment or a gentle shower setting on your hose. I've also invested in rainwater harvesting with a couple of water butts, which not only saves on water bills but provides my plants with unchlorinated water – another little win for soil health!
7. Your Path to Bountiful Harvests: A Summary of No-Till Success
So, there you have it, fellow gardeners. We've journeyed from understanding the silent threat of compacted soil to implementing practical, no-till strategies that will revolutionise your raised beds. This isn't just about tweaking a few things; it's about shifting your entire approach to soil, recognising it as a living, breathing entity that, when nurtured, will reward you with unparalleled harvests.
I remember when I first started with my 800 sq ft here in the Midlands, full of enthusiasm but lacking real understanding. My raised beds were okay, but my crops often struggled, especially my beloved heirloom tomatoes which always seemed to get leggy and slow. I was digging, tilling, and fighting against nature. It was only when I embraced these no-till principles – observing, adding organic matter, and letting the soil's natural processes do the work – that my garden truly began to flourish.
Now, my raised beds are teeming with life, from the earthworms churning through the soil to the vibrant, healthy plants above. My 'Cherokee Purple' tomatoes in the greenhouse are bigger and juicier than ever, my herbs are lush, and my root vegetables grow straight and strong, no longer fighting through dense soil. I spend less time fighting weeds and more time simply enjoying my garden, experimenting with new varieties, and watching nature do its thing.
You've learned to spot the signs of compaction – water pooling, stunted growth, struggling roots. You've understood why no-till isn't just a trend, but a scientifically sound method for healthier soil. We've covered immediate relief, like broadforking and adding that initial layer of organic matter, and then delved into the long-term, sustainable practices: building soil with compost, protecting it with mulch, and revitalising it with cover crops. And crucially, we’ve laid out the simple, golden rules for preventing compaction from ever taking hold again.
It's a journey, not a sprint, and you might not see overnight miracles. But I promise you, with patience and these no-till strategies, you'll witness a remarkable transformation in your raised beds. Your plants will be happier, your harvests more abundant, and your gardening experience far more enjoyable and sustainable. Go on, give it a go – your soil, and your taste buds, will thank you for it!
